

 In today's tutorial we will
combine surrealism and fashion effortlessly to create a state of art
portrait. I'll show you how to achieve this essentially through a
combination of photos, filters and brushes. You can then translate these
techniques into your designs to add an artistic edge to them!
In today's tutorial we will
combine surrealism and fashion effortlessly to create a state of art
portrait. I'll show you how to achieve this essentially through a
combination of photos, filters and brushes. You can then translate these
techniques into your designs to add an artistic edge to them!
Showing posts with label designing. Show all posts
Showing posts with label designing. Show all posts
Friday, July 9, 2010
Stylish Surreal Portrait
In today's tutorial we will
combine surrealism and fashion effortlessly to create a state of art
portrait. I'll show you how to achieve this essentially through a
combination of photos, filters and brushes. You can then translate these
techniques into your designs to add an artistic edge to them!
Saturday, June 12, 2010
Realistic water running on tap
 Through this tutorial, we will learn how to use a combination of
photoshop filters to create a realistic effect of water running from a
tap..
Through this tutorial, we will learn how to use a combination of
photoshop filters to create a realistic effect of water running from a
tap..
Saturday, May 22, 2010
Ice Effect

In this tutorial, you’ll learn how to create an ice effect completely from scratch using special Photoshop Brushes. Some time ago playing with Photoshop and trying to make an ice effect I discovered that “dead trees” can simulate very well the ice’s “veins” giving a cool feeling to an image. I’m not going for realism here, but I do like the final effect for this tutorial. I used some text as reference, but this effect can be applied to any shape you want and can add some great style. Let’s get started!
Thursday, May 13, 2010
Create an abstract Valentine background with hearts

In this tutorial, you’ll see how to create an abstract Valentine background, using a simple shape from Custom Shapes Tool and crosshatch brush from Brush Tool. So let’s start!
Saturday, May 1, 2010
How to create a spattered photomontage in Photoshop

In this tutorial, we’ll learn how to make a spattered photomontage in Photoshop using brushes and some filters. Layered PSD file included. Let’s get started!
Tuesday, April 20, 2010
Without Face: Photoshop Cheating

Hey, are you interesting on cheating methods in Photoshop? If yes then I’ll show u how to create one interesting effect with human face. I’m going to cover almost all the face with plain skin. This lesson is more suitable for those users who have some experience with Photoshop.
Sunday, March 28, 2010
Drop Shadow in Photoshop

You can add a realistic drop shadow to an image with Photoshop. Versions do not matter. You can do it in Photoshop 7 or higher versions.
A drop shadow has been added to the image of the boy.
Wednesday, March 24, 2010


Monday, March 22, 2010
Bokeh Effect with Photoshop

This is a special effects Photoshop tutorial using a particular Brush - SS - Bokeh. This Brush is not available in Photoshop, but can be downloaded free. The link for free download is given in the tutorial.
I have taken this free stock image.
 The same image with the special effect created with the Brush.
Sunday, March 14, 2010
Change color of dress and also learn to use the Pen Tool
Do you find the Pen Tool to be confusing? Don't be. It is very easy to use once you know how. I will also show you how to change the color of the a dress without affecting the rest of the image and in the proces you will be able to use the Pen Tool too without any confusion.

I have changed the lady's white sari into red without affecting the rest of the image.
The Pen Tool is a powerful Tool. Many avoid it because they find it difficult. It is not difficult to master. I will use the Pen Tool for selecting the dress of a girl and change the color. Just follow it. You will be able to handle the Pen Tool effortlessly by the end of this tutorial.
Channels for cutting out Objects - II

I had a posted a tutorial on cutting out a part of an image such as a figure cleanly with channels. This is a continuation of the tutorial. The object of the tutorial is to make the object to be cut out, either completely black with the help of channels or completely white. In the last tutorial I had shown how to cut out a figure after turning it complely black against a white background. This will be just the opposite -- a white figure on a black background. This is to stress that whatever method you use, you can either make the figure to be cut out either black or white.
Background - Changing Background

I have been asked to demonstrate something basic -- Changing the background of a photo. It is easily done.
Saturday, February 27, 2010

Page Curl
 In this tutorial we are going to show how you can make a page curl effect with simple steps using warp technique in photoshop.
 Bald effect with Photoshop

This is a special effects Photoshop tutorial. This to make a person look bald. You don't need to go to the barber for that bald look, you can do it in Photoshop. You will need the Pen Tool, the Healing Brush Tool, the Brush Tool and the Sharpen Tool for this tutorial.
Skull Manipulation in Photoshop
This is a special effects tutorial to create a rather macabre effect -- portions of skull showing through the skin on the face.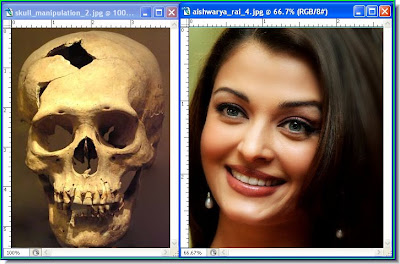
Monday, February 22, 2010


Saturday, February 20, 2010
Collage against brick wall
I have been asked to post a tutorial on a collage against a brick wall. It is quite easy to do. First you need a photo of a brickwall. You can get a free stock photo here. You only have to register. The site is http://www.sxc.hu/
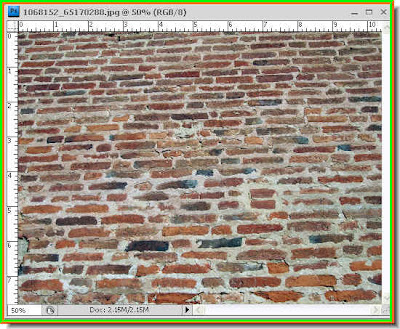 Step 1 : I have opened the photo of the brickwall.
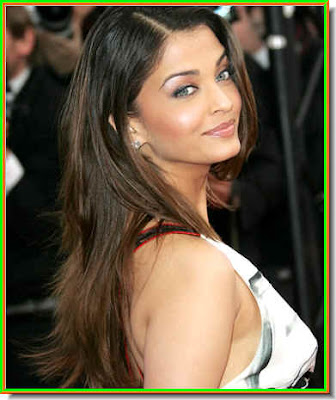 Step 2 : Now choose a set of photos for the collage. I have opened one of Aishwarya Rai.
 Step 3 : Click the Move Tool.
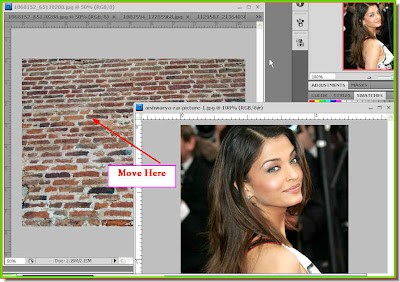 Step 4 : Drag the photo onto the brick wall with the Move Tool.
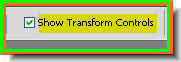 Step 5 : In the top panel make sure that Show Transform Controls (Bounding Box in PS7) is checked).
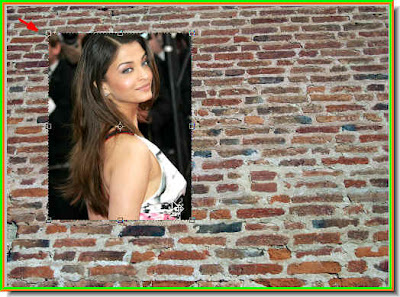 Step 6 : The photo has been moved to the brick wall. Note you can see the corner handles because the Show Transform Controls are checked.
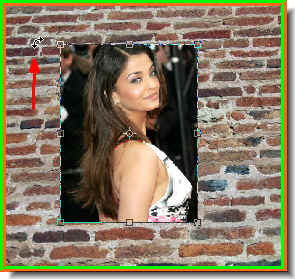 Step 7 : Press SHIFT and ALT and drag inwards. This will resize the photo proportionately and make it smaller. (You can make it bigger proportionately in the same way). Note that a small bent arrow appears when you hover the cursor on a corner.
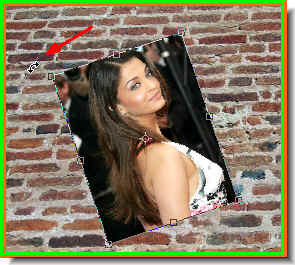 Step 8 : Use the bent arrow to rotate the photo in any direction you please. I have rotated it to the left. Then press Enter to apply the transformation.
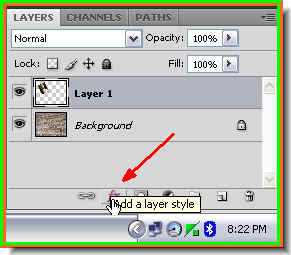 Step 9 : Click the Add Layer Style Button.
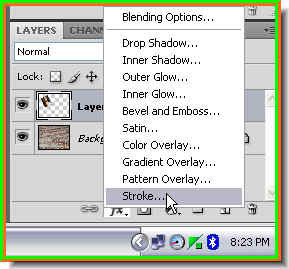
Step 1 : I have opened the photo of the brickwall. Step 2 : Now choose a set of photos for the collage. I have opened one of Aishwarya Rai. Step 3 : Click the Move Tool. Step 4 : Drag the photo onto the brick wall with the Move Tool.Step 5 : In the top panel make sure that Show Transform Controls (Bounding Box in PS7) is checked). Step 6 : The photo has been moved to the brick wall. Note you can see the corner handles because the Show Transform Controls are checked.Step 7 : Press SHIFT and ALT and drag inwards. This will resize the photo proportionately and make it smaller. (You can make it bigger proportionately in the same way). Note that a small bent arrow appears when you hover the cursor on a corner.Step 8 : Use the bent arrow to rotate the photo in any direction you please. I have rotated it to the left. Then press Enter to apply the transformation.Step 9 : Click the Add Layer Style Button.Step 10 : Click Stroke from the popup.
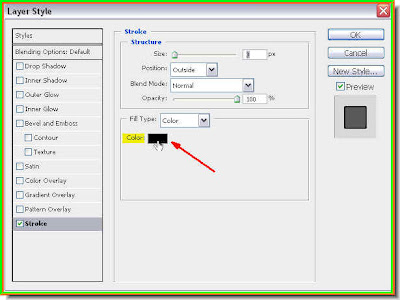 Step 11 : When the Stroke dialogue box opens click on the Color.
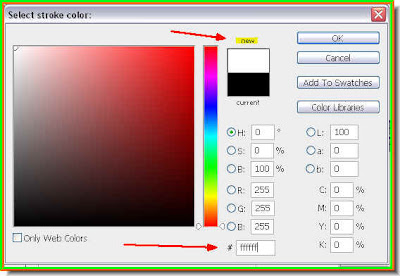 Step 12 : In the Select Stroke Color dialogue box type 'ffffff' (five 'f's) into the box shown by the red arrow. The 5 'f's denote White. Look at 'New' at the top. You will see that the top half has changed to White. Click Ok.
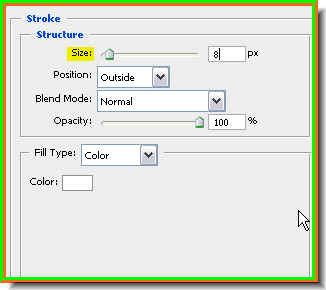 Step 13 : Increase the size of the Stroke. It is set at 3 pixels as default. How much will depend on your image and what you find satisfying. I have set it at 8 pixels. Click ok.
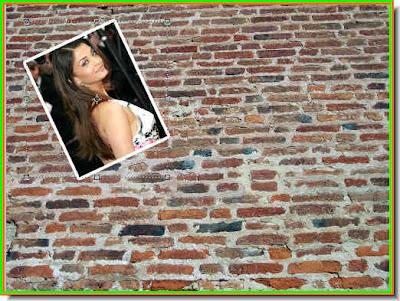 There that is how it looks. Now following exactly the same steps add the other photos, resize them rotate them and add a White Stroke. You can add any number of images. Make sure that they are of the roughly the same size and resolution. A high resolution image on a low resolution background can cause problems and vice versa.
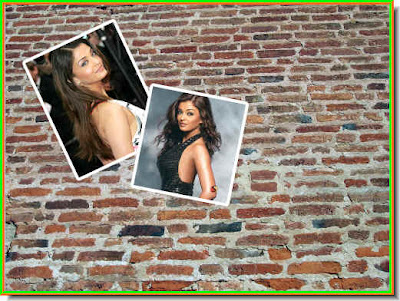 Following exactly the same steps I have added another photo.
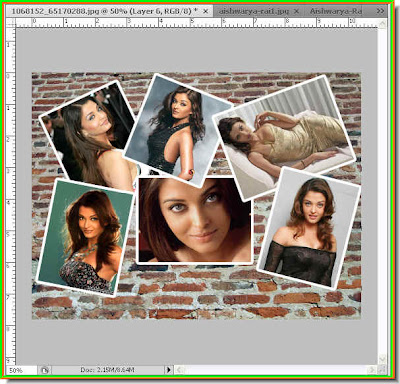 I have added six photos.
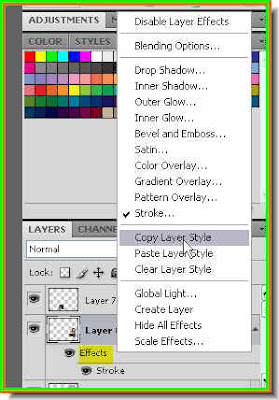 Step 14 : I will teach you a trick which will help when you add a number of layer styles quickly. Go the layer below the one you are working on after adding a new photo. I have added a new photo. It is on Layer 7. I am now clicking on Layer 6. Right click the Effects. From the popup
click on Copy Layer Syle.
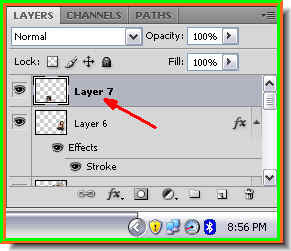
Step 15 : Now I am clicking back on Layer 7.
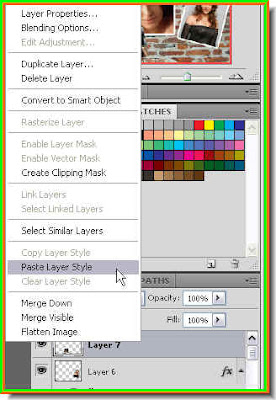
Step 16 : I am right clicking Layer 7 and from the popup clicking on Paste Layer Style.
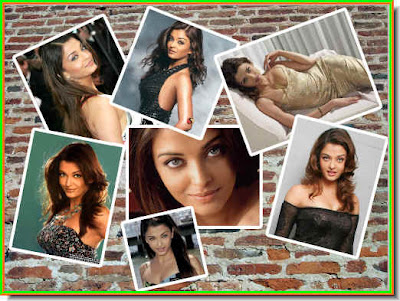
Look what has happened. Since I have used only one layer style i.e. Stroke. It has been applied to the seventh photo that I have added. When you apply a number of layer styles to a layer, you copy and paste them to subsequent layers helping save time and effort.
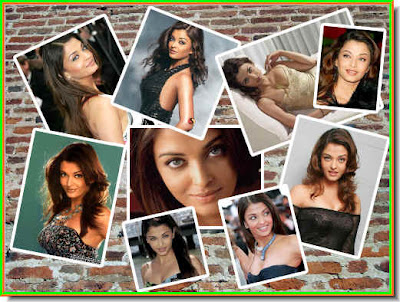 I have finished adding all the photos.
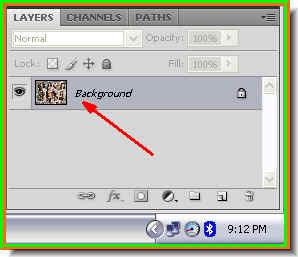 Step 17 : Now press CTRL+SHIFT+E. This is the Merge Layer command. All the layers have been merged into a single layer i.e. the background.
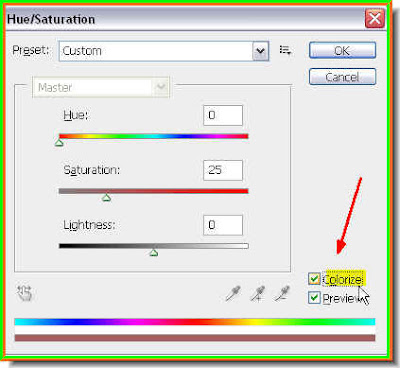 Step 18 : Press CTRL+U. This will bring up the Hue/Saturation dialogue box.
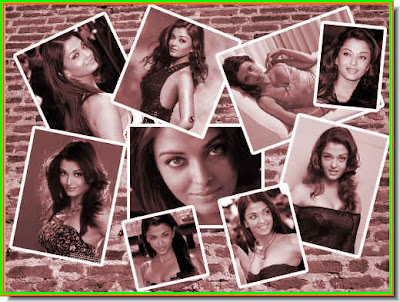 The image looks like this with the default Hue/Saturation settings.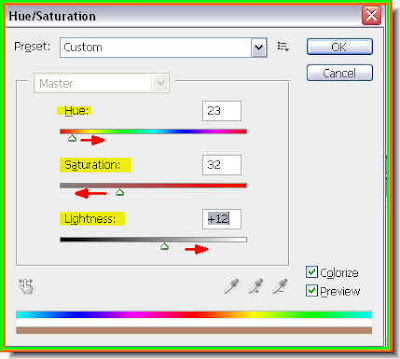
Step 19 : First drag the Hue slider slightly to the right to get the Sepia tone. You can of course change to any other color you like. Dragging the Hue slider will allow you to change the color. Next drag the Saturation slider depending on the saturation you want. Lastly set the Lightness slider which will brighten or lessen the brightness of the image.
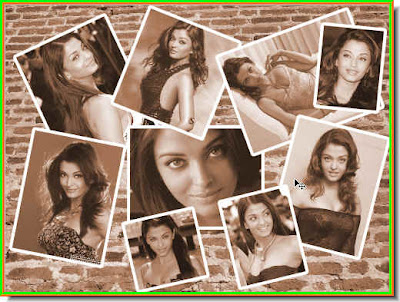
And this is the finished collage. Try it out.
Subscribe to:
Posts (Atom)


