
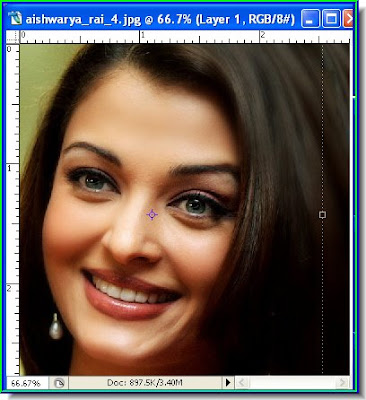
This is a special effects tutorial to create a rather macabre effect -- portions of skull showing through the skin on the face.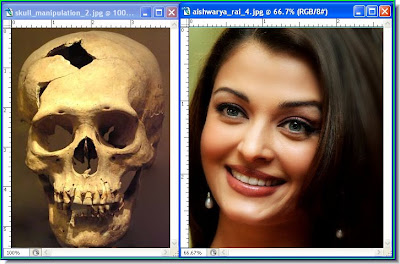
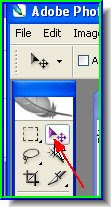
Step 2 : Click the Move Tool to select it.
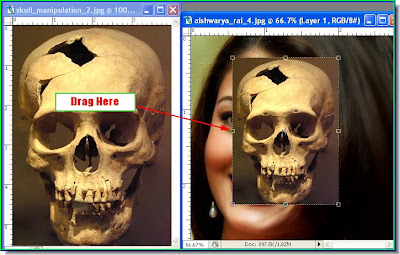
Step 3 : Drag the skull onto the face.
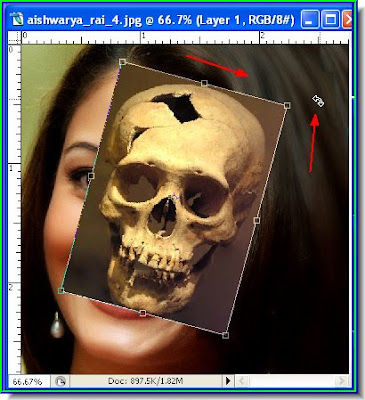
Step 4 : Hover the cursor near a corner and small bent arrow will appear. Use it to rotate the skull till it is at the same angle as the face.
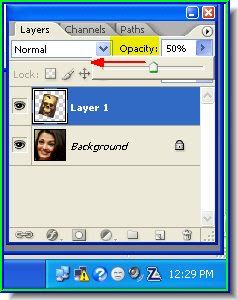 Step 5 : In the Layer/Channels/Paths pallette the skull is on Layer 1 above the background, which is the face. Reduce the opacity of the skull layer to around 50 % so that the face below becomes visible through the skull image.
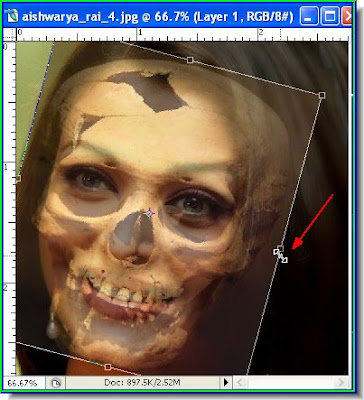 Step 6 : With Move Tool resize the skull by dragging at the sides and top as shown above.
 Step 7 : When you satisfied with the repositioning click the Move Tool or any other Tool and the Apply The Transformation dialogue box opens. Click apply.
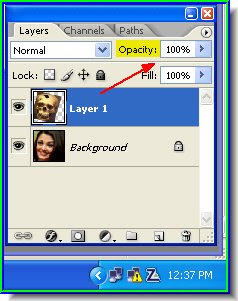
Step 5 : In the Layer/Channels/Paths pallette the skull is on Layer 1 above the background, which is the face. Reduce the opacity of the skull layer to around 50 % so that the face below becomes visible through the skull image. Step 6 : With Move Tool resize the skull by dragging at the sides and top as shown above. Step 7 : When you satisfied with the repositioning click the Move Tool or any other Tool and the Apply The Transformation dialogue box opens. Click apply.Step 8 : Restore the opacity of the skull layer (Layer1) to 100 %.
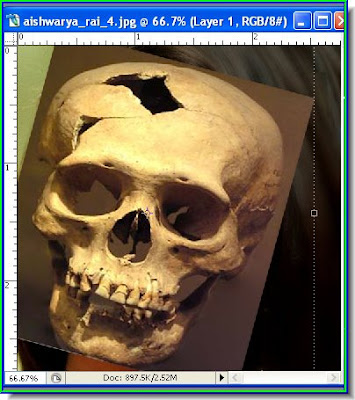
Step 9 : This is how the image looks.
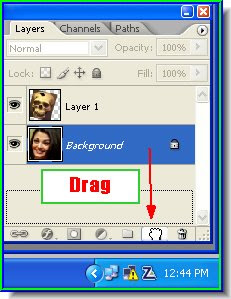 Step 10 : In the Layers/Channels/Paths pallette drag the Background down to the New Layer button.
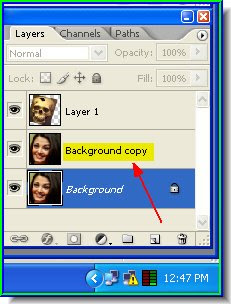 Step 11 : This creates a 'Background copy'.
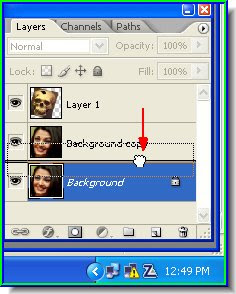
Step 10 : In the Layers/Channels/Paths pallette drag the Background down to the New Layer button. Step 11 : This creates a 'Background copy'.Step 12 : Drag Layer 1 (Layer containing the skull image) below the Background copy layer.
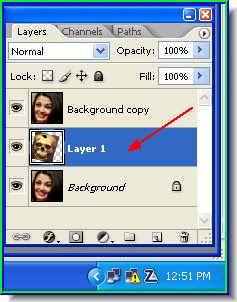
Step 13 : Layer 1 is now below Background copy.
Step 14 : The skull is now hidden because it has been dragged below the face layer.
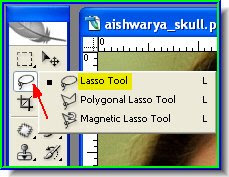 Step 15 : Click the Lasso Tool to select it.
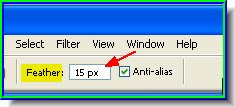
Step 16 : In the top panel I have set the Feather at 15 px. You can more or less depending on your image.
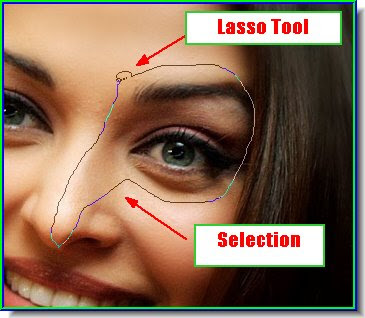
Step 17 : Draw a selection where you would like the bones to show through with the Lasso Tool.
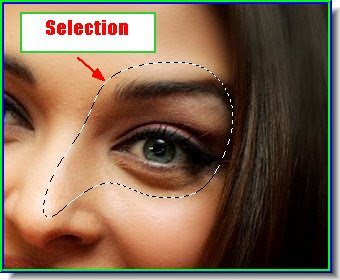
Step 17 : When you come back to the first point that you clicked the selection will turn into a column of 'marching ants' see above.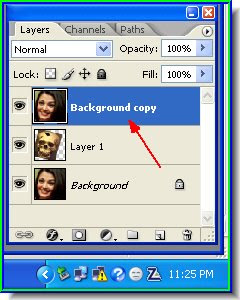
Step 18 : Now click on the Background Copy layer to select it.
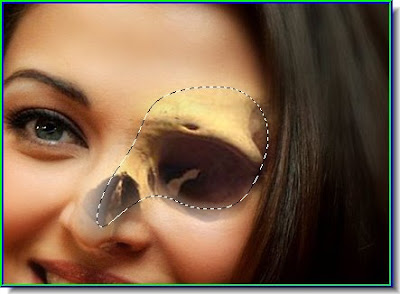
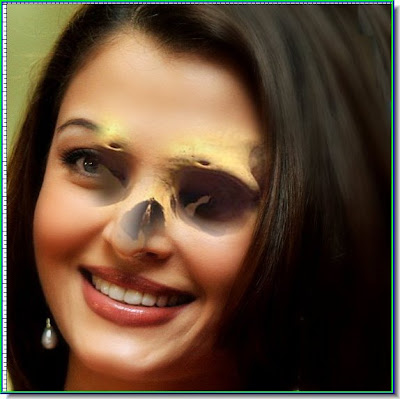
Step 19 : Hit delete. The skull bones will show up. See above. Press CTRL+D to deselect.
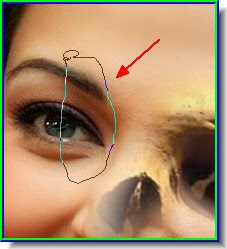
Step 19 : Draw another selection with the Lasso Tool. 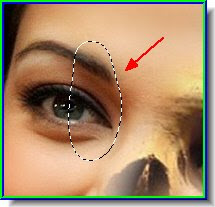
Step 29 : Again a column of marching ants appear. Hit DELETE.
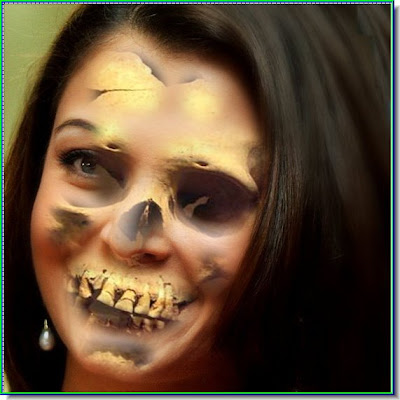
Step 30 : Make some more selections with the Lasso Tool and then hit Delete to reveal more of the skull bones.
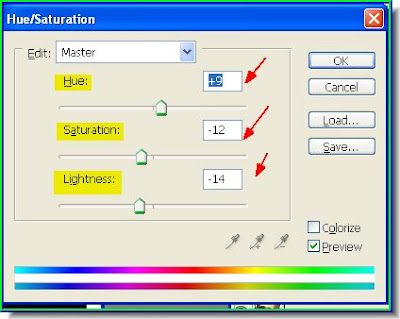
Step 31 : Press CTRL+U and it will bring up the Hue/Saturation dialogue box. Play around with the Hue, Saturation and Lightness sliders. It will depend on your image.
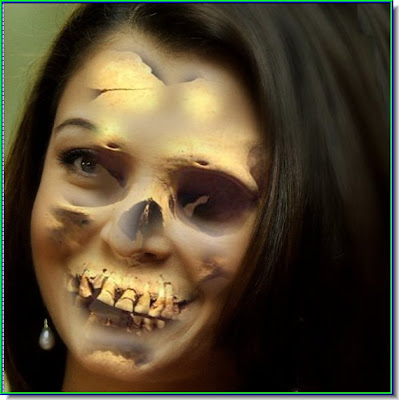 The image after tinkering with Hue/Saturation. That is all. One thing I can say, I would not like to meet my creation on a dark night.


