

I have been asked to demonstrate something basic -- Changing the background of a photo. It is easily done.
Step 1 : I have opened this photo in Photoshop.
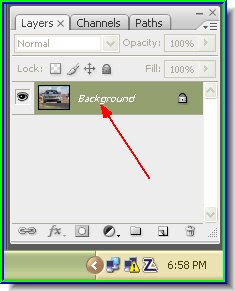
Step 2 : In the Layers/Channels/Paths palletes you will find the photo as Background. Double click the Background.
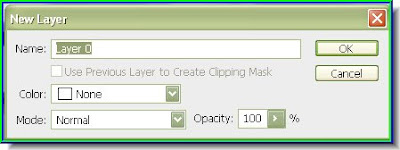
Step 3 : When you double click the Background you find the New Layer dialogue box pop up. Click ok.
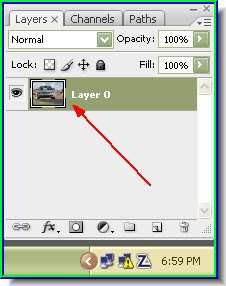
Step 4 : You wil find that the Background has changed to Layer 0.
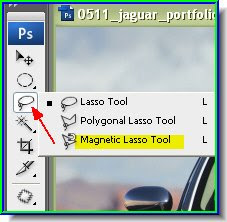
Step 5 : Choose the Magnetic Lasso.
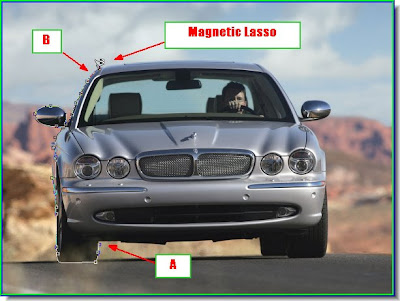 Step 6 : I have begun clicking with the Magnetic Lasso from point A. You can choose from where to begin. You can see that I have reached point B by clicking points with the Magnetic Lasso. If you place a point wrongly, just hit the Delete key on the keyboard, which will remove it then continue as before.
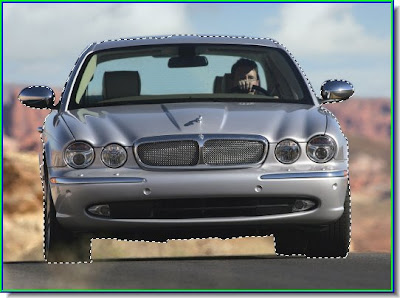
Step 6 : I have begun clicking with the Magnetic Lasso from point A. You can choose from where to begin. You can see that I have reached point B by clicking points with the Magnetic Lasso. If you place a point wrongly, just hit the Delete key on the keyboard, which will remove it then continue as before.Step 7 : The selection has been completed.
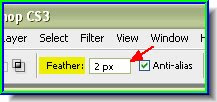
Step 8 : Look in the top panel and set a Feather Radius of 2 pixels. Anti-Alias should be checked.
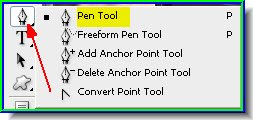
I have used the Magnetic Lasso here. For very precise cutting the Pen Tool is always preferable. Look here for the tutorial on Pen Tool.
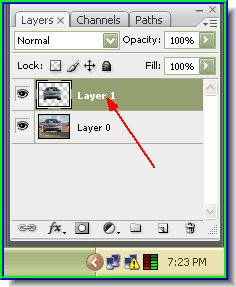
Step 9 : Press CTRL+J. This will copy and paste the selection to a new layer. Look in the Layers/Channels/Paths pallete. You will find a new layer -- Layer 1 -- over Layer 0.
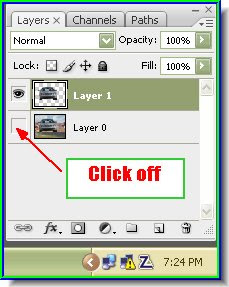 Step 10 : Now click off the eye icon of Layer 0.
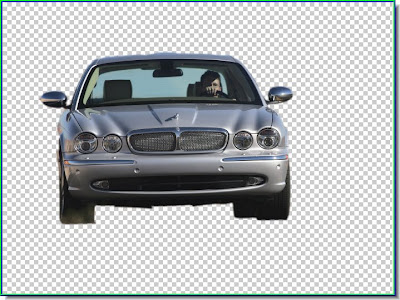 The background has disappeared.
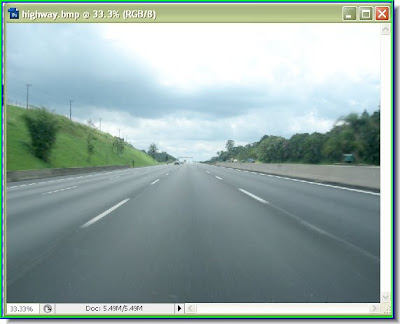 Step 11 : I have opened this photo of a highway in Photoshop.
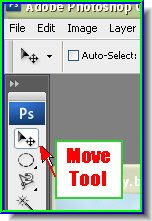 Step 12 : Click the Move Tool to select it.
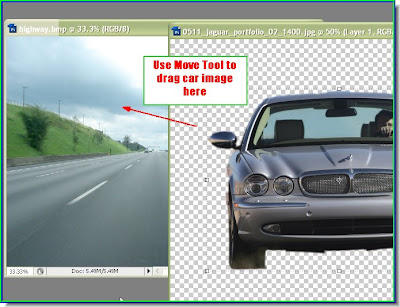 Step 13 : Keep SHIFT pressed and drag the car onto the highway. This will ensure that it lands proportionately in the middle.
Step 10 : Now click off the eye icon of Layer 0.The background has disappeared. Step 11 : I have opened this photo of a highway in Photoshop. Step 12 : Click the Move Tool to select it. Step 13 : Keep SHIFT pressed and drag the car onto the highway. This will ensure that it lands proportionately in the middle.


