

Day can be changed to night in Photoshop. It is easy and can be done in a number of steps, you just have to have some patience. Get busy in turning day into night with Photoshop.
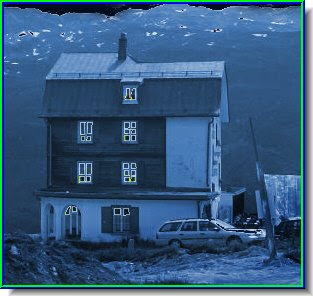
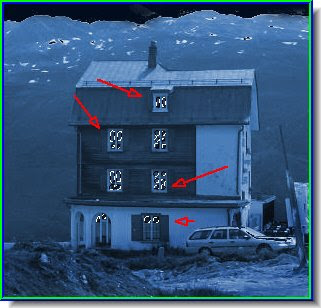
Step 1 : I have opened this image in photoshop. Note that there is a house in the picture and windows are visible. The windows are important as you will learn later.
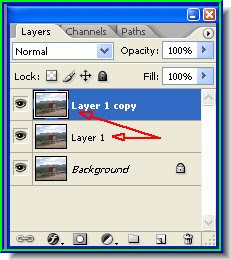
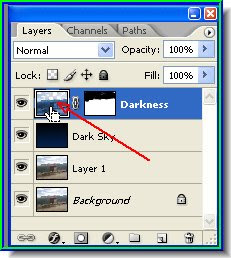
Step 2 : Press CTRL+A (Select All) then CTRL+J twice. This will copy the Background twice as Layer 1 and Layer 1 Copy. You can see it in the Layers/Channels/Paths pallette.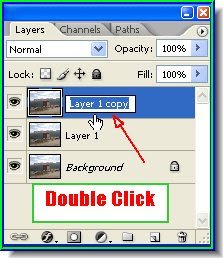
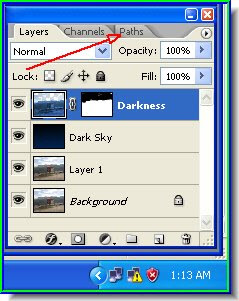
 Step 3 : Click Layer 1 Copy where shown by the arrow on the top illustration to rename the Layer. Change the name of the Layer 2 Darkness. In the illustration above you can see how a layer is renamed.
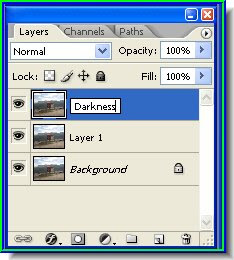
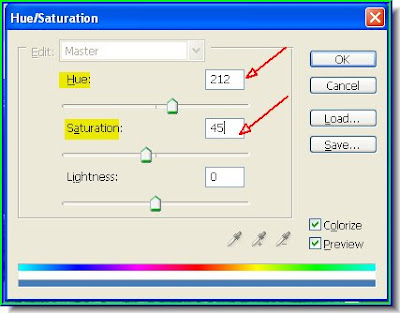 Step 4 : Press CTRL+U on the keyboard to bring up the Hue/Saturation dialogue box. Check the Colorize box and give the values given for Hue and Saturation. Click ok.
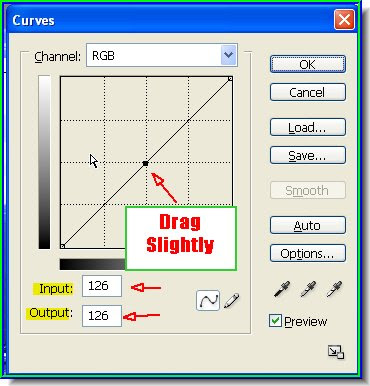
Step 5 : Press CTRL+M on the keyboard. This will bring up the Curves. Click on the middle of the diagonal slightly and the Input and Output boxes will become visible.
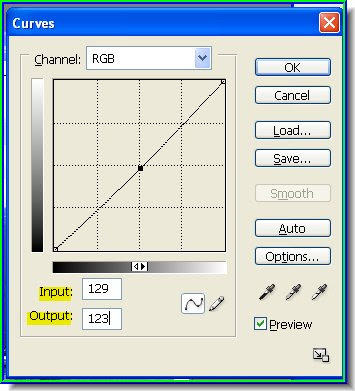 Step 6 : Put the values shown into the Input and Output boxes. Click ok.
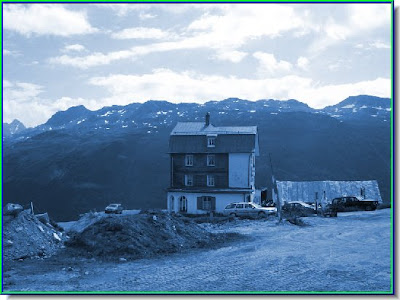
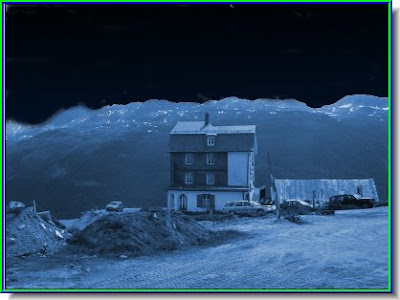
This is how the image looks.
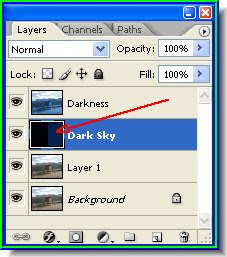
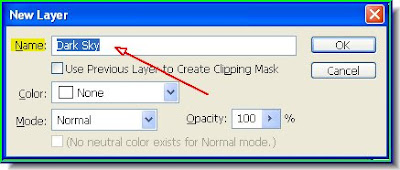 Step 7 : Press CTRL+SHIFT+N on the keyboard to bring up the New Layer dialogue box. Name it Dark Sky. In the Layer/Channels/Paths pallette position the Dark Sky below the Darkness layer with the Move Tool.
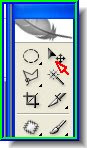 Step 8 : This is the Move Tool
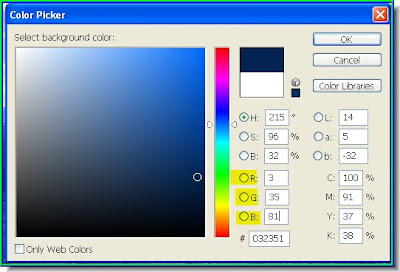 Step 9 : Click the Background Color (which is White by default). It will bring up the Color Picker.You have to change the values of R G B as shown. R = 3, G = 35 and G = 81. Click ok.
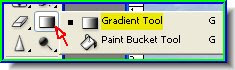 Step 10 : Select the Gradient Tool.
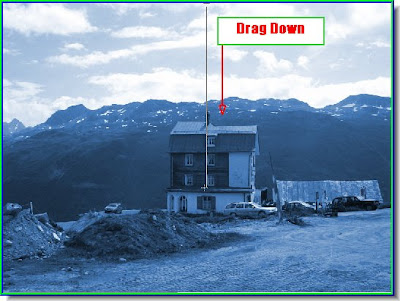
Step 11 : Now drag from the middle top to about the middle. You will not notice any change.
Step 12 : You will see that the Dark Sky Layer has been filled with the gradient.
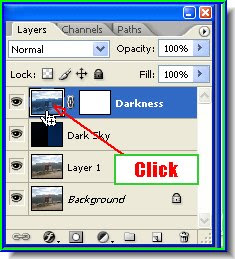
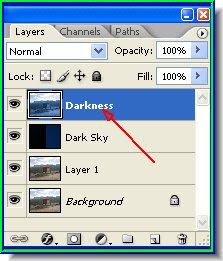 Step 13 : Now click back on layer labelled Darkness to select it.
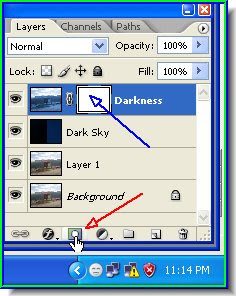 Step 14 : Click on the Layer Mask button in the Layers/Channels/Paths pallette. The Layer Mask instantly forms beside Darkness Layer thumbnail.
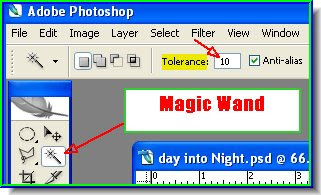
Step 15 : Now click the Magic Wand Tool. Set the Tolerance at 10.
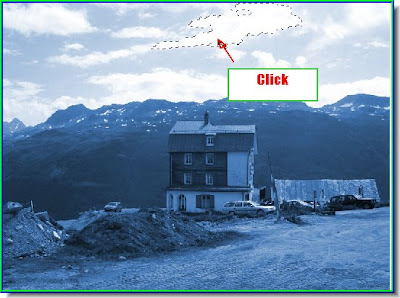 Step 16 : I have clicked on the white clouds. The Magic Wand automatically selects an area.
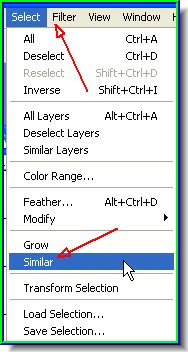 Step 17 : Go to Select>Similar.
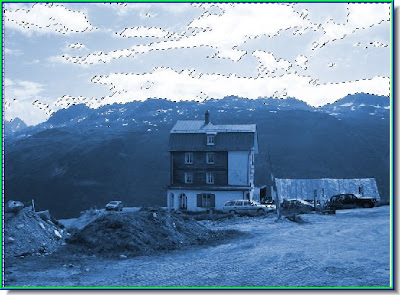
This selects all the clouds.
 Step 18 : Now click on the layer thumbnail to the left of the Layer Mask and hit the DELETE key on your keyboard.
Hitting the DELETE key will delete the white portions. Press CTRL+D to get rid of the selection.
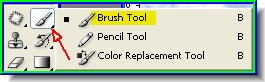
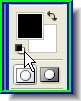
 Step 19 : Click the Brush Tool to select it. Make sure that the Foreground Color is set to Black and the Background to White. If it is not click where the arrow points to and it will restore the Foreground and Background colors. Painting with the Black foregrond color will hide and the White Foreground Color will restore it should you make a mistake. You can switch between Background and Foreground color with 'X' in your keyboard. Now click on the Layer Mask beside the Darkness thumbnail to select it.
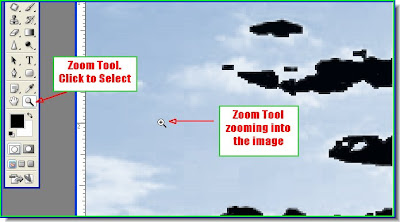 Step 20 : Click the Zoom Tool to select it. Place it on the sky and click with the left mouse button to zoom in. You can also use the bracket keys [ ] to zoom in or out.
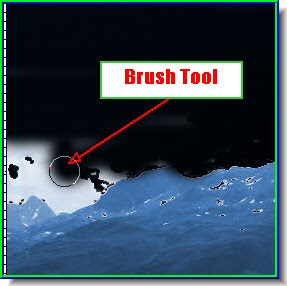
Step 21 : With the Brush Tool paint the sky. The finished sky.
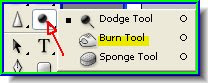 Step 22 : Again click on the Darkness thumbnail to select it. Now click the Burn Tool.
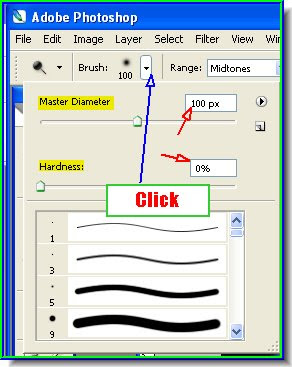 Step 23 : Now click where the blue arrow points to it will reveal a drop down from which you can set the Master Diameter and Hardness. I have set the Master Diameter at 100 px and Hardness at 0 %. The Range should be set to Midtones. You will find it at the top right.
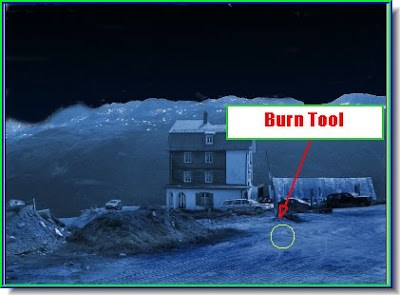 Step 24 : With the Burn Tool selected, I have painted over the foreground to darken it. The more the number of passes you make with the Burn Tool, the darker it becomes. So do not over do it.
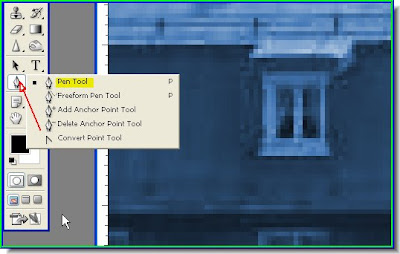 Step 25 : Now zoom in on the windows, then select the Pen Tool.
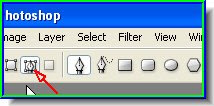 Click the icon on top after selecting the Pen Tool.
 Step 26 : I have clicked at the corners of the window panes.
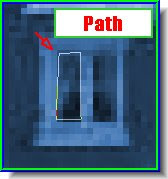 Step 27 : As soon as you come back to the first point you clicked the selection becomes a Path. Do not have to worry about it now. Now click with the Pen Tool on all the glass panes.
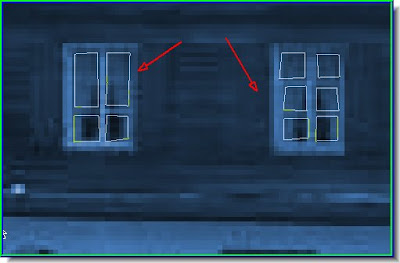 I have selected more glass panes with the Pen Tool. The selections have turned into paths as you can see.
Step 22 : Again click on the Darkness thumbnail to select it. Now click the Burn Tool.Step 23 : Now click where the blue arrow points to it will reveal a drop down from which you can set the Master Diameter and Hardness. I have set the Master Diameter at 100 px and Hardness at 0 %. The Range should be set to Midtones. You will find it at the top right. Step 24 : With the Burn Tool selected, I have painted over the foreground to darken it. The more the number of passes you make with the Burn Tool, the darker it becomes. So do not over do it. Step 25 : Now zoom in on the windows, then select the Pen Tool. Click the icon on top after selecting the Pen Tool. Step 26 : I have clicked at the corners of the window panes. Step 27 : As soon as you come back to the first point you clicked the selection becomes a Path. Do not have to worry about it now. Now click with the Pen Tool on all the glass panes. I have selected more glass panes with the Pen Tool. The selections have turned into paths as you can see.All the glass panes have been selected.
 Step 28 : In the Layers/Channels/Paths pallette click Paths to access the Paths pallette.
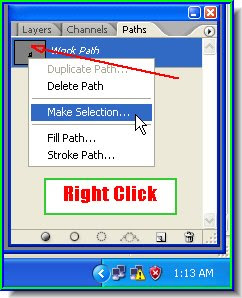
Step 29 : In the Paths pallette you will see the thumbnail of a 'Work Path'. Right click the thumbnail. Then right click the Make Selection.
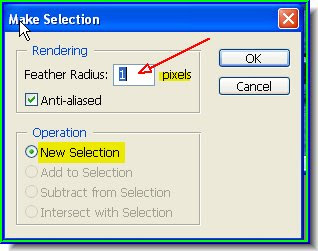
Step 30 : As soon as you right click the Make Selection box opens. Put a Feather radius of 1 pixel. Click ok.
Step 31 : As soon as you click ok, the selection will be visible as a column of 'marching ants'.
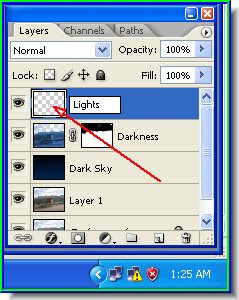 Step 32 : Now click back on the Layers pallette in the Layers/Channels/Paths pallette. Press CTRL+J on the keyboard and the selection will be cut and pasted onto a new layer. Rename it Lights. Now press CTRL+I. And what do you get?
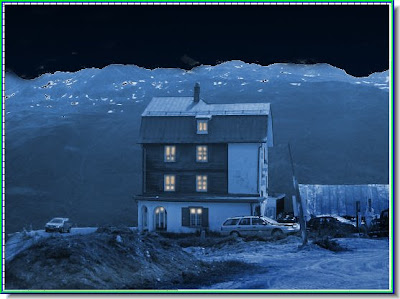
The lights have come on in the dark house!!

Step 33 : Make a new layer by pressing CTRL+SHIFT+N on the keyboard on top of all the layers and name it Stars.
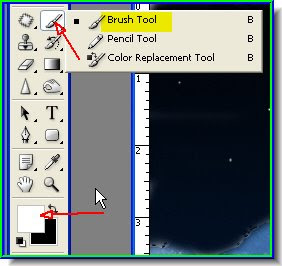
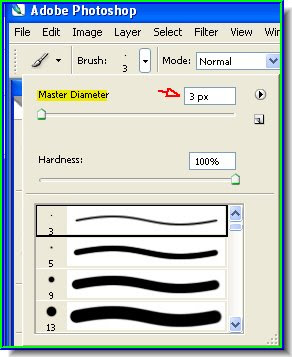
Step 34 : Make the Foreground White, then select the Brush Tool. Set the Diameter to 1 and paint the dots on the dark sky. Then select a Diameter of 3 and reduce the opacity to 60 % and paint in some more stars.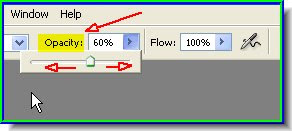
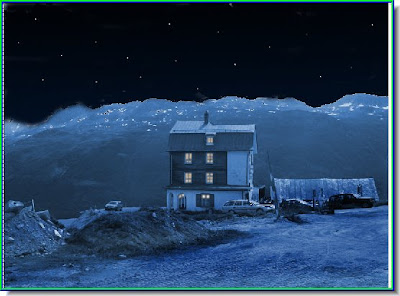
Day has been turned into night. Try it out.


