
Step 1 : I have opened this free stock photo of a clean shaven man. I will add the beard.

 |
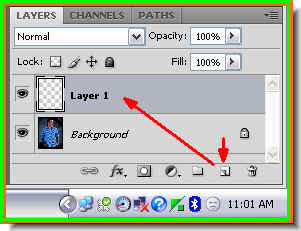 Step 3 : Click the New Layer button and an empty Layer 1 forms. The Layer 1 will be used to create a beard and moustache.
 Step 4 : Click on the Zoom Tool.
 Step 5 : I have zoomed in on the face with the Zoom Tool. Now to select the Brush Tool.
 Step 4 : Click on the Brush Tool to select it.
 Step 5 : In the top panel look at the right. You will find the icon that the red arrow points to. Click it.
 Step 6 : The Brushes pallete opens.
 Step 7 : Now click on Brush no 112. See the arrow. This will select the Brush.
 Step 8 : First click on the Brush Tip Shape then check Shape Dynamics and Scattering. Lastly drag the Spacing slider to the left. I have dragged it to 20%. It will depend on your image. This is a high resolution free Stock Photo. I have downloaded it for free from here. You can do it too.The site is http://www.sxc.hu/index.html After you have applied the settings click where the blue arrow points to and the Brushes pallette will disappear. (It looks a bit different in Photoshop7). To make the Brush Tip small press the [ (Left Bracket key) and to make it bigger ] (Right Bracket Key). You will be required to switch between a large and a small brush tip constantly.
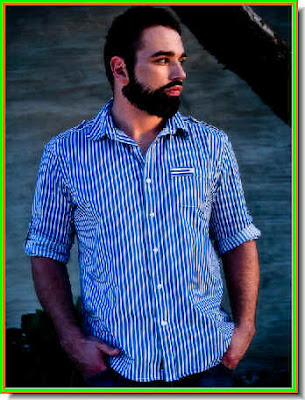
 Step 9 : I am using the brush to paint the beard.
 There's the beard.
 Step 10 : I have made the brush smaller and painted in the moustache.
 Step 11 : Just brush over the edges to prevent it from looking unkempt.
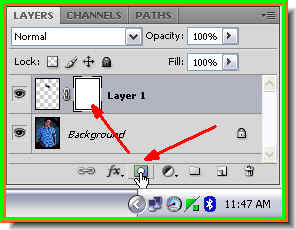 Step 12 : Click the Add Layer Mask button and a layer mask forms next to the layer thumbnail on Layer 1.
 Step 13 : Click the Brush Tool again and then the icon on the top panel at right.
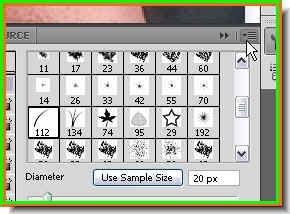 Step 14 : Look where the white arrow points to. Click the tiny black arrow.
 Step 15 : This dialogue opens. Click on Reset Brushes.

 Step 18 : Now click where the arrow points to on the left of the top panel.


 Step 6 : I have lowered the Opacity to 70%.
 And you have a gray beard.
 Step 7 : I am changing Blend Mode from the popup menu to Screen.


