
I will use this photo of Aishwairya Rai Bacchan to demonstrate how a hairstyle can be changed with a Quick Mask and the Warp Tool. The Warp Tool cannot be found in Photoshop 7.

This is the Quick Mask button. It toggles between the Edit in Quick Mask and edit in Standard Mode.
 Step 1 : Click it once and the Quick Mask button light up briefly.
  Step 2 : Click the Brush Tool to select it.
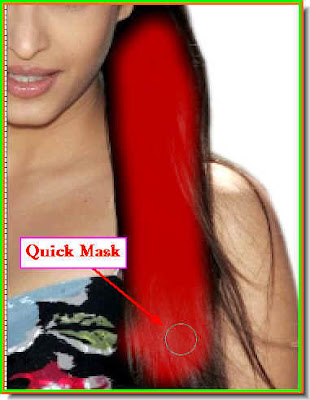 Step 3 : I have zoomed into the image. With the Quick Mask on I have painted a bit of the hair.
 Step 4 : Now click this once button once to Edit in Standard Mode.
 Step 1 : Click it once and the Quick Mask button light up briefly.
  Step 2 : Click the Brush Tool to select it.
 Step 3 : I have zoomed into the image. With the Quick Mask on I have painted a bit of the hair.
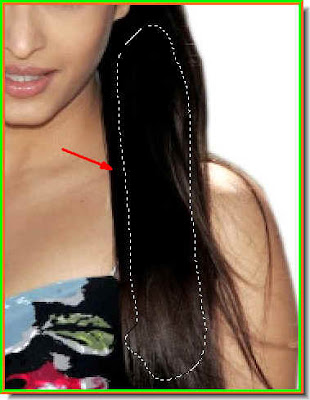
 Step 4 : Now click this once button once to Edit in Standard Mode.
Step 5 : The red mask disappears and is replaced by a selection of 'marching ants'.
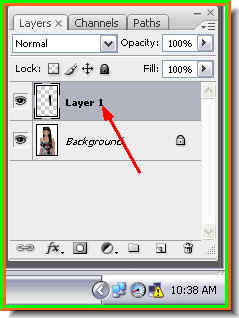
Step 6 : With the selection of 'marching ants' in place, press CTRL+J. This will copy and paste the selection onto a new layer i.e. Layer 1.
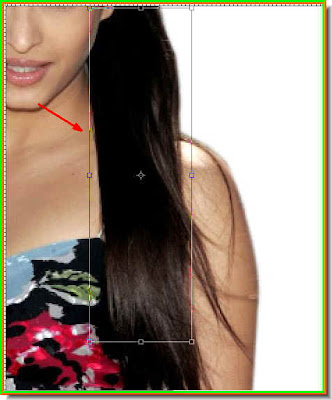
Step 7 : Press CTRL+T. A selection will appear.
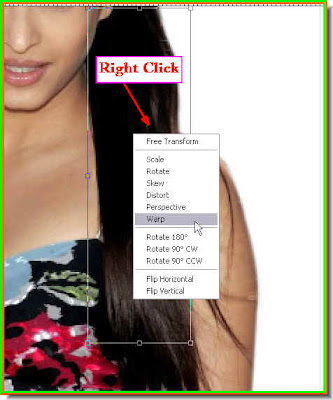

Step 8 : Right click inside the selection. A popup appears. Click Warp from it.
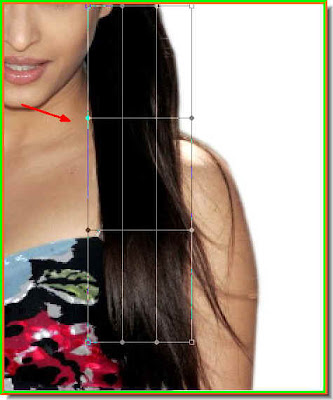
Step 9 : The Warp grid can be seen.
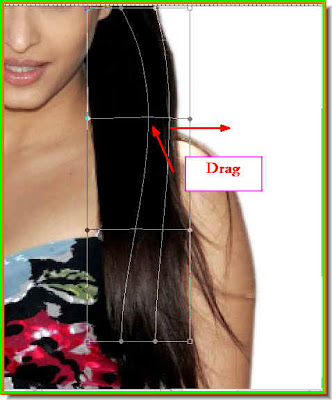
Step 10 : Drag the point of the grid outwards as shown.
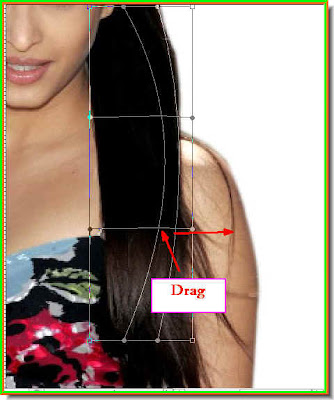

Step 11 : Now drag a second point of the grid as shown outwards.
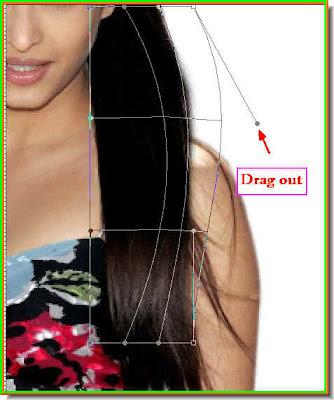
Step 12 : Now drag this handle outwards.
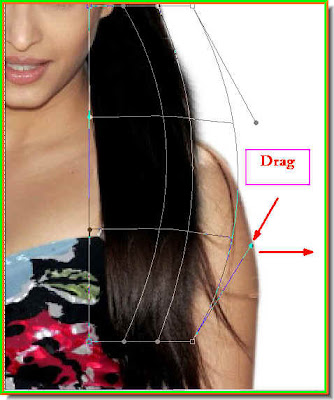
Step 13 : Now drag out the other handle outwards.
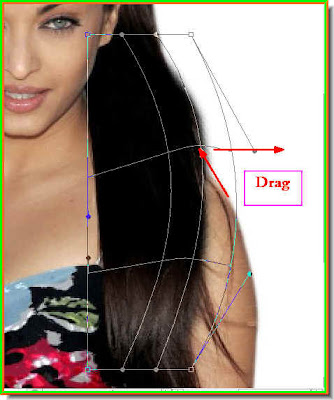
Step 14 : Now drag out this point outwards again.
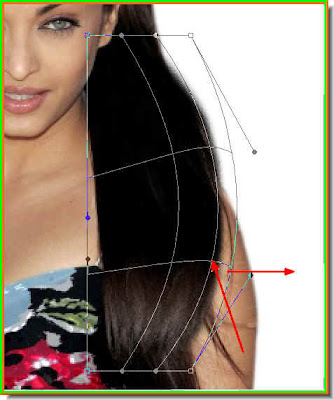

Step 15 : Now drag the second point outwards.
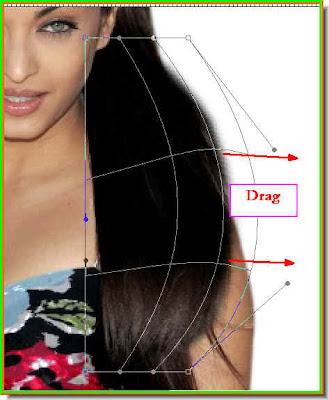
Step 16 : Now drag both the points outwards one at a time.
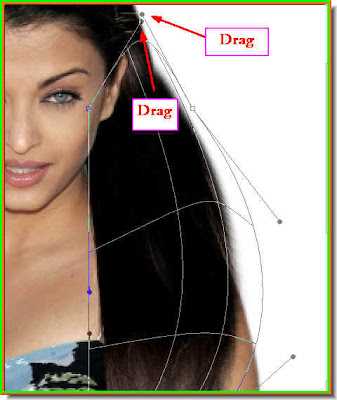
Step 17 : Now drag these two handles upwards. I am only showing you the handles should be dragged. The points will be different with the image you use.
 Step 18 : After you are satisfied with the effect of the Warp press ENTER. The
Warp will be be committed. You can see how the hair now looks fuller as it drops down from the shoulder.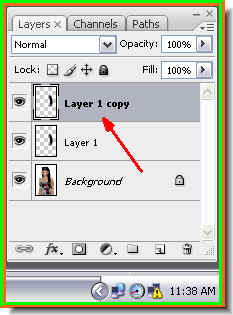 Step 19 : Press CTRL+J. This will duplicate Layer 1 as Layer 1 copy.
 Step 18 : After you are satisfied with the effect of the Warp press ENTER. The
Warp will be be committed. You can see how the hair now looks fuller as it drops down from the shoulder.
 Step 19 : Press CTRL+J. This will duplicate Layer 1 as Layer 1 copy.
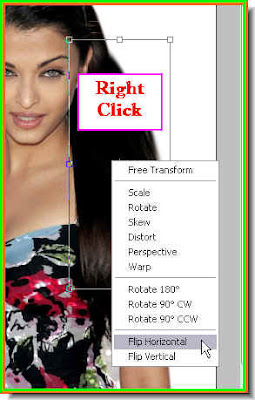
Step 20 : Press CTRL+T. This will form a selection. Right click inside the selection. From the popup click on Flip Horizontal.
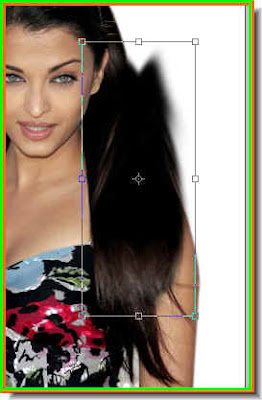
Step 21 : The selection of hair has been flipped horizontally. But it has to be repositioned.
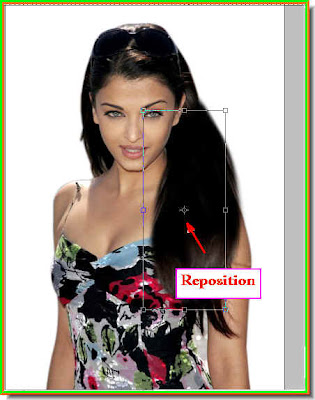
Step 22 : Reposition the selection with the cursor.
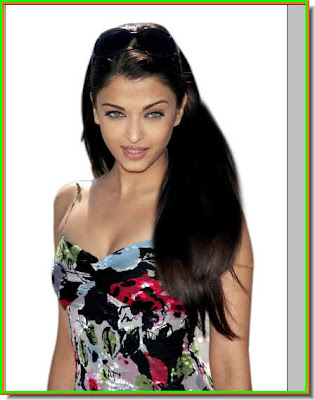
The hair as it looks now. Much more fuller than we began with. Compare it with the image we began with.
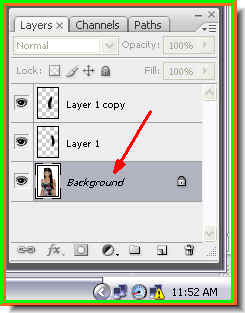
Step 23 : Click back on the Background.
 Step 24 : Click the Edit in Quick Mask button.
 Step 24 : Click the Edit in Quick Mask button.
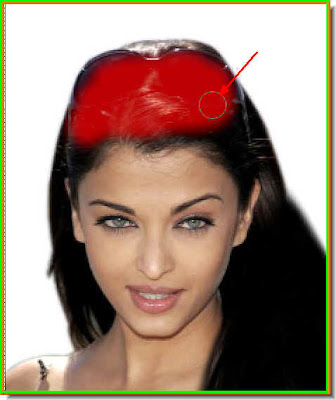
Step 25 : With the Brush Tool paint a selection in another part of the hair.
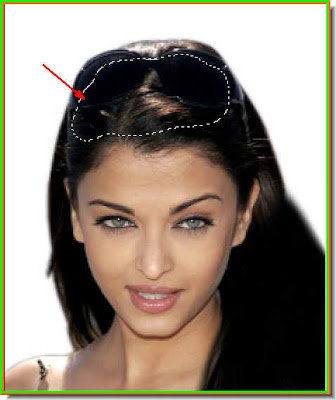
Step 26 : Press the Edit in Standard Mode button (which is the same as the Edit in Quick Mask button). Press just once and the red mask goes away. It is replaced by a selection of 'marching ants'.
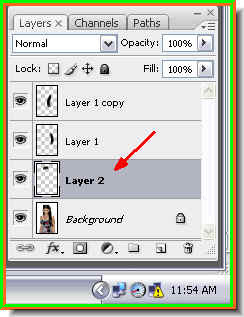
Step 27 : With the selection in place press CTRL+J. This will copy and paste the selection to a new layer -- Layer 2.
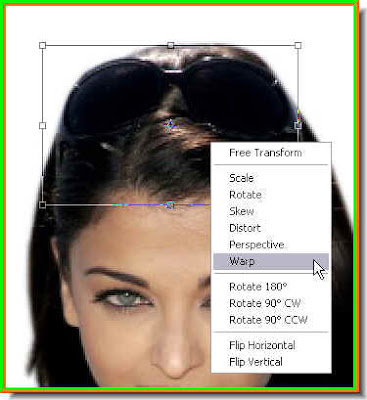
Step 28 : Press CTRL+T. A selection appears. Right click inside the selection and from the popup click on Warp.
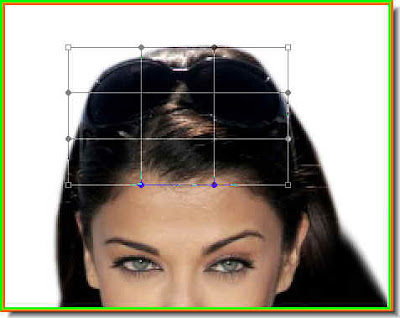

The Warp grid becomes visible.

Step 29 : Drag down the points of the Warp grid in the middle as shown.
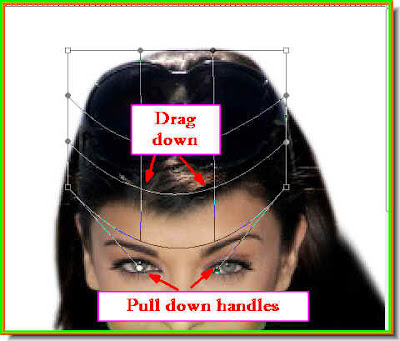
Step 30 : Now drag down the grid points in the middle again. Then drag down the handles as shown. Press Enter.
 This is how the hair looks.
 This is how the hair looks.
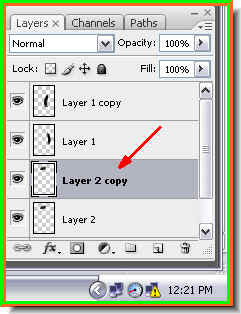
Step 31 : Press CTRL+J. This will copy and paste the hair to another layer -- Layer 2.
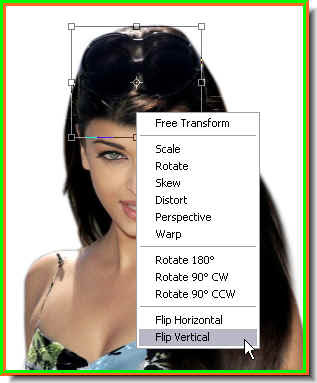

Step 32 : Press CTRL+T. This will bring up a selection. Right click inside it. From the popup click on Flip Vertical.
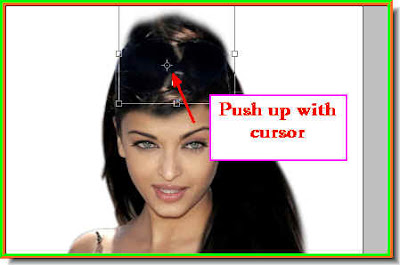
Step 33 : Push up the flipped selection with the cursor.

This is how the hairstyle looks.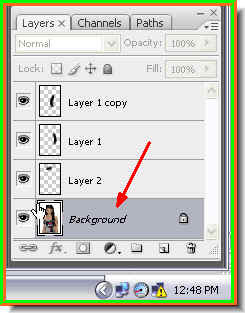

Step 34 : Click back on the Background layer.
 Step 35 : Click the Edit in Quick Mask Mode button.
 Step 36 : Click the Brush Tool.
 Step 35 : Click the Edit in Quick Mask Mode button.
 Step 36 : Click the Brush Tool.
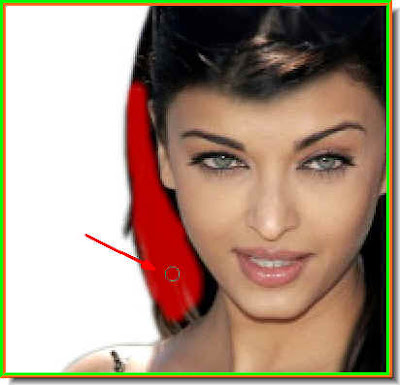
Step 37 : Paint a section of the hair with the brush.
 Step 38 : Click the Edit in Standard Mode button.
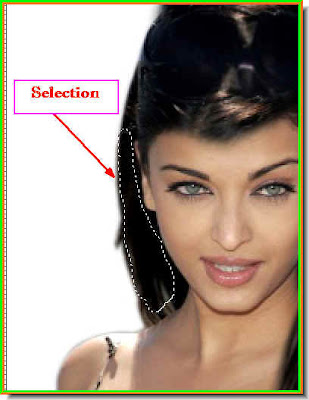
 Step 38 : Click the Edit in Standard Mode button.
Step 39 : A selection appears.
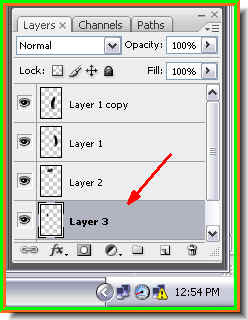 Step 40 : Press CTRL+J. This will copy and paste the selection on a new layer -- Layer 3.
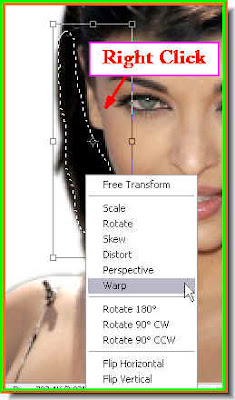 Step 41 : Press CTRL+T. A selection appears. Right click inside it. From the popup choose Warp.
 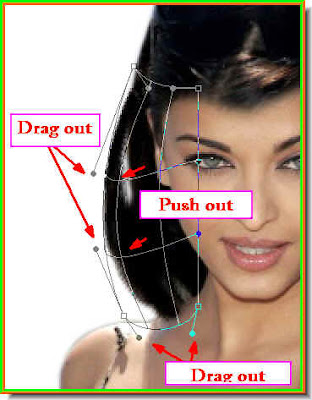 Step 42 : From the Warp grid drag out the grid lines and the handles as shwon. Press Enter when finished.
 There ! Does not Mrs Rai Bachan have a lovelier head of hair now ? Try it out.


