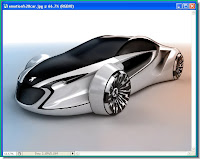
You can download brushes from the internet and load it into Photoshop. But then you may not be able to get exactly what you are looking for. So why not make your own brush? That will solve the problem. It is quite easy to make a brush. Just follow the steps.
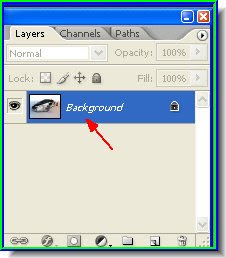
Step 2 : Look at the Layers/Channels/Paths pallette. You will find the background layer there. We have to duplicate it.
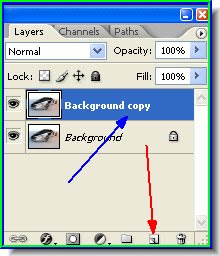

Step 3 : Using the Move Tool drag the Background layer to the New Layer icon (the icon like the folded paper shown by the red arrow) and a Background copy layer will form (blue arrow).
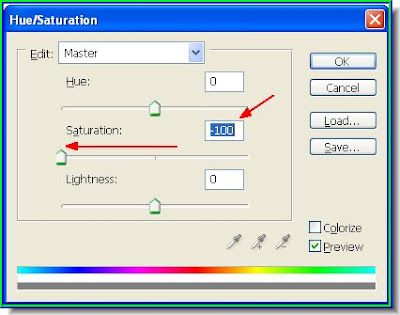
Step 4 : Press CTRL+U on the keyboard. It will bring up the Hue/Saturation dialogue box. Drag the Saturation slider to the extreme left as shown. Click ok.
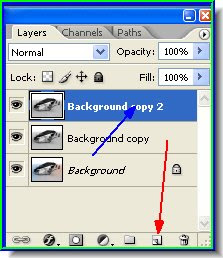 Step 5 : Now drag the Background Copy to the New Layer icon and Background Copy 2 will form.
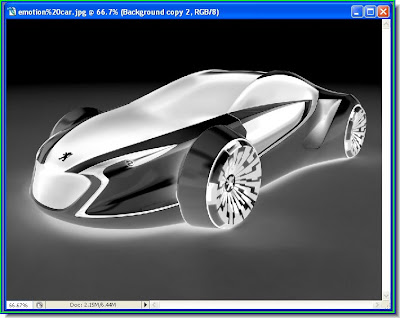 Step 6 : Press CTRL+I on the keyboard and your image will look like a negative as above.
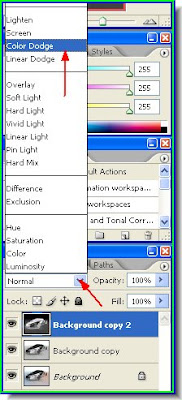 Step 7 : Now in the Layers/Channels/Paths pallette change the blend mode from Normal to Color Dodge from the popup box.
 Step 5 : Now drag the Background Copy to the New Layer icon and Background Copy 2 will form.
 Step 6 : Press CTRL+I on the keyboard and your image will look like a negative as above.
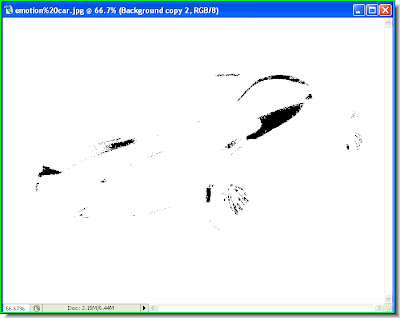
 Step 7 : Now in the Layers/Channels/Paths pallette change the blend mode from Normal to Color Dodge from the popup box.
Step 8 : This is what my image looks like. It may also turn completely white. It will depend on the image you have chosen.
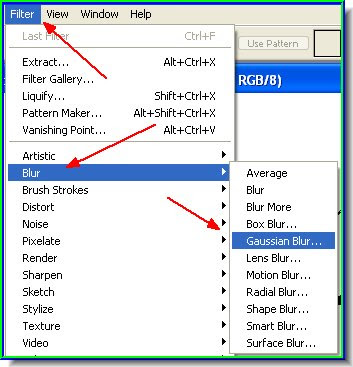 Step 9 : Go to Filter>Blur>Gaussian Blur
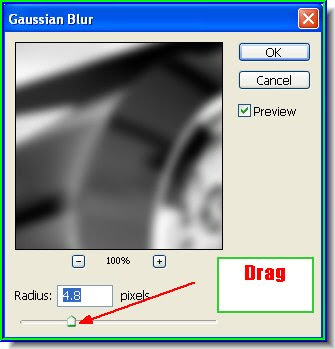 Step 10 : In the Gaussian Blur dialogue box drag the slider suitably. You can see the effect as soon as you drag the slider. Do it till you are satisfied. Click ok.
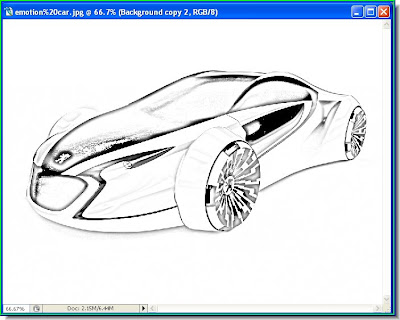
Step 11 : This is what the car looks like now. Just like a sketch. In fact, this is how you reduce a photo to a sketch in Photoshop. But I am interested in making a brush. So follow the next few steps.
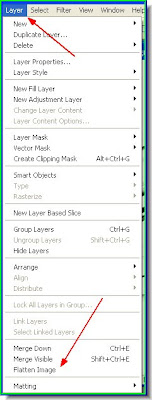
Step 12 : Go to Layer>Flatten Image. Use the Eraser Tool to eraze any annoying detail that might be there. There are none in the image I have chosen.
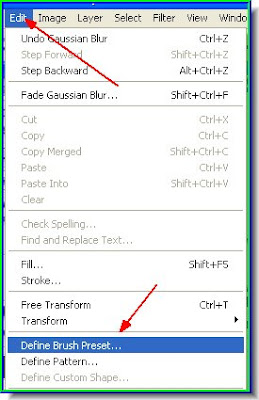

Step 13 : Go to Edit>Define Brush Preset.

Step 14 : The Brush Name dialogue box pops up. Give it a name. I am naming the brush 'sportscar'. Click ok.
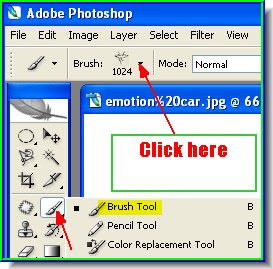

Step 15 : Click on the Brush Tool and then click where shown by the red arrow.
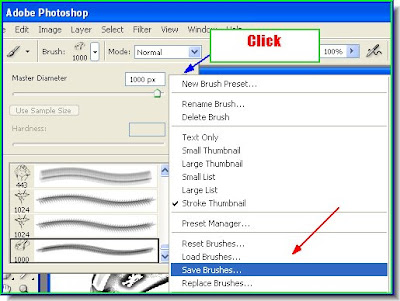

Step 16 : There is a small black arrow where the blue arrow points to. Click it and the above dialogue will appear. Click on Save Brushes. 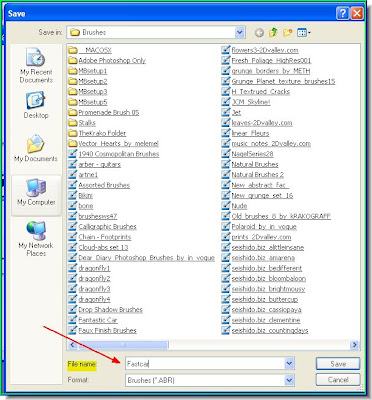

Step 17 : When you click Save, the Save in Dialogue Box opens. You can save it umder Unassorted Brushes or as Fastcar (Oops! I forgot I named it sportscar), which I have done. You can give any name. Now Exit Photoshop and load it up again.
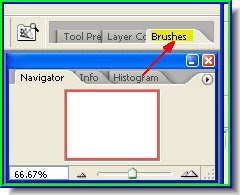
Step 18 : When you open Photoshop again, go to the top right. You will find Brushes there. (See the red arrow) Click it.
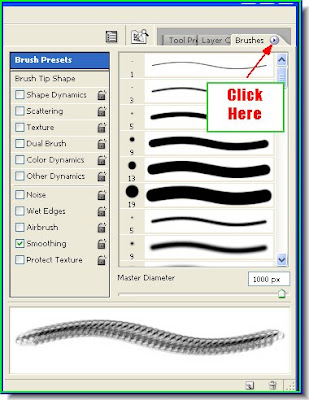

Step 19 : Click where the red arrow points to.
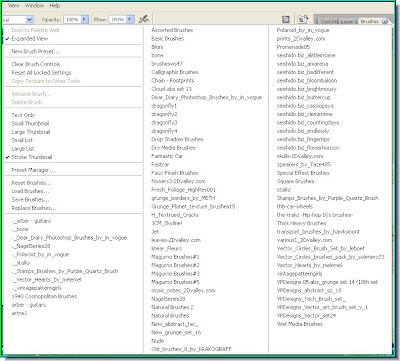
Step 20 : As soon as you click you will find all the different brushes available in Photoshop.
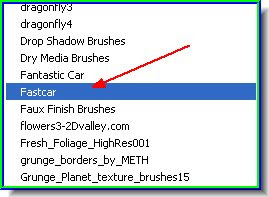

Step 21 : And there is Fastcar, the brush that I made. Click to select it.
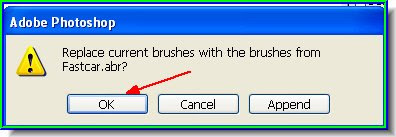

Step 21 : As soon as you click the brush or any other brush, this dialogue box appears. You can click ok or also Append, which will then append the brush to the curent set you are using.

Step 22 : Now click on the Brush Tool again.
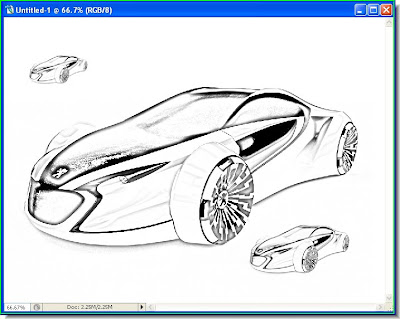 And there you have your brush. Custom made. Use the bracket [ ] to make the brushtip bigger or smaller.
 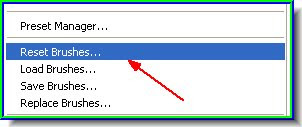 When you finish your work with the brush, go to Brushes on the right top of Photoshop as shown earlier and click Rest Brushes. This will restore it to the default set. Another important matter is PS7 allows brushes with a resolution of 999 pixels only, but in PS CS 2 it can be 2000. High resolution brushes are always good. You can set the pixels from Image>Image Size.
 And there you have your brush. Custom made. Use the bracket [ ] to make the brushtip bigger or smaller.
  When you finish your work with the brush, go to Brushes on the right top of Photoshop as shown earlier and click Rest Brushes. This will restore it to the default set. Another important matter is PS7 allows brushes with a resolution of 999 pixels only, but in PS CS 2 it can be 2000. High resolution brushes are always good. You can set the pixels from Image>Image Size.
 And, do you know, many not only make brushes, but also sell them on the internet. So what are you waiting for? Get cracking.
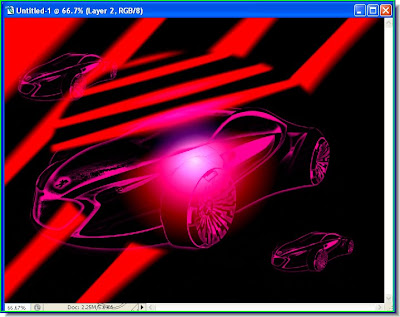 To whet your appetite, I have created a background and used my new brush on it. You can do it too.
On second thoughts I am adding some additional steps after Step 11. This is to deal with background that the image may have.
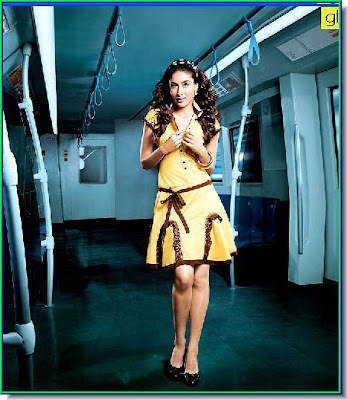
Take for example an image like this. There is a lot of background detail. This has to be removed.

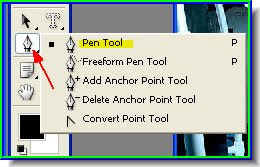
The best way is to make a selection either using the Magnetic Lasso Tool or the Pen Tool, whichever you are comfortable with. Then cut it out.

The other alternative is to painstakingly erase the background after flattening the image.
Let us try making a selection with the Magnetic Lasso Tool.
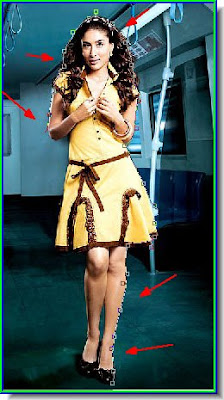
I am selecting by clicking points all around the images of the figure. If you go wrong just hit Delete and continue clicking till you come back to the first point. A selection will then be made.
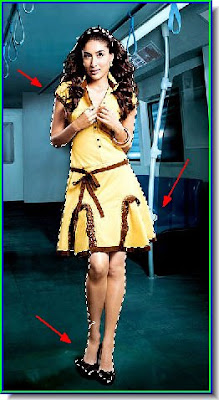
The selection has been completed.
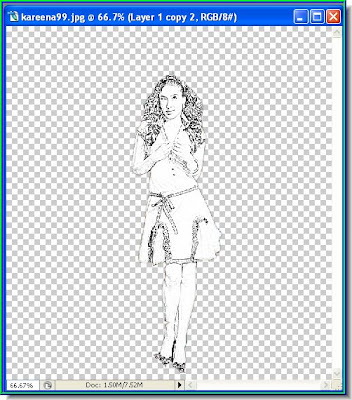
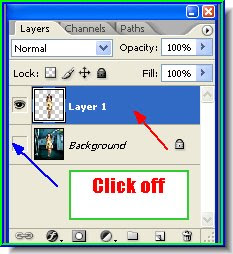 Press CTRL+J on the keyboard to copy and paste the selection to a new layer. In the Layers/Channels/Paths pallette click off the eye icon on the background CTRL+CLICK the layer thumbnail in Layer 1. This will reselect the image.
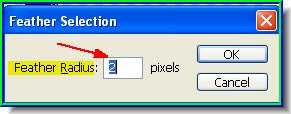 Press ALt+CTRL+D on the keyboard and the Feather selection dialogue box will come up. Feather by 1 or two pixels. Click ok. Press CTRL+D to deselcct. Now follow through with the other steps.

The image is ready for converting into a brush with none of the distraction of a background. Go to step 12 and continue.
 Press CTRL+J on the keyboard to copy and paste the selection to a new layer. In the Layers/Channels/Paths pallette click off the eye icon on the background CTRL+CLICK the layer thumbnail in Layer 1. This will reselect the image.
 Press ALt+CTRL+D on the keyboard and the Feather selection dialogue box will come up. Feather by 1 or two pixels. Click ok. Press CTRL+D to deselcct. Now follow through with the other steps.